Linisher
The very first thing I made with my speed 10 was the rollers and bed for a linisher to take 100mm belts. All the bits, 3" dia. pipe and 4" C girder, apart from the belts everything else came out of the scrap bin at work. It has proved to be one of the most useful things I've made.
Bending Rolls
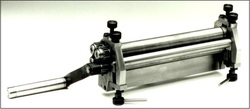
In 1989 I bought from Hemingway the bending rolls kit by George Thomas. The kit was bought to give me practice in using my newly purchased Speed 10 from Myford.
I started, like most of our projects, with lots of enthusiasm but then other things got in the way and the rolls were put back into the box and it wasn't until I needed to make the Smokebox tube for Simplex this year that I got the kit out and started work again. Unfortunately the original hand drawn instructions and drawings had disintegrated over the years in the bottom of the box. I contacted Hemingway to purchase new drawings I was very pleased with their response in sending me a complete set of the new instructions which enabled me to finish it late last year and I am very proud of the results.
I started, like most of our projects, with lots of enthusiasm but then other things got in the way and the rolls were put back into the box and it wasn't until I needed to make the Smokebox tube for Simplex this year that I got the kit out and started work again. Unfortunately the original hand drawn instructions and drawings had disintegrated over the years in the bottom of the box. I contacted Hemingway to purchase new drawings I was very pleased with their response in sending me a complete set of the new instructions which enabled me to finish it late last year and I am very proud of the results.
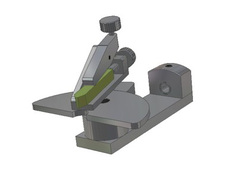
Graduating tool

The graduating tool was made to give me more practice at making tooling. I have decided I want to make a Cutter grinder. I will need to make some dials and thimbles which will need graduating.
This kit proved to be straightforward to make and has turned out to look very good and is accurate.
This kit proved to be straightforward to make and has turned out to look very good and is accurate.
Worden cutter grinder

After lots of deliberation regarding the best cutter grinder for me I decided on the Worden. I went this route because I felt the build would be straightforward and within my capabilities. I considered the usual Tinker and Quorn but I decided I might not live to see the finish of a Quorn! All those ball handles meant another tool to make them. I think the Worden will, with some accessories, i.e 4 facet drill sharpening jig, radius table and a small vertical slide be all that I need.
I have just finished the Worden (with a small amount of artistic license)and it has proved be sturdy and as far as I can tell at the moment, accurate. It now remains to start some accessories and possibly the fitting of a diamond wheel although the standard green and white grit wheels produce a very good finish on lathe tooling. After a small amount of polishing with a slip stone the tools I have sharpened are quite capable of slicing cigarette papers. See my gallery for more pictures. You will note the traverse gear I have fitted, see the photo gallery, this was designed by Jim Whetren and was published in Model Engineers Workshop some time ago. A very worthwhile addition, it gives absolute control when cutter grinding.
I have just finished the Worden (with a small amount of artistic license)and it has proved be sturdy and as far as I can tell at the moment, accurate. It now remains to start some accessories and possibly the fitting of a diamond wheel although the standard green and white grit wheels produce a very good finish on lathe tooling. After a small amount of polishing with a slip stone the tools I have sharpened are quite capable of slicing cigarette papers. See my gallery for more pictures. You will note the traverse gear I have fitted, see the photo gallery, this was designed by Jim Whetren and was published in Model Engineers Workshop some time ago. A very worthwhile addition, it gives absolute control when cutter grinding.
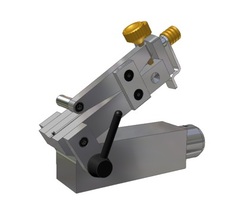
Radius Jig
The radius Jig is used to grind an accurate radius on lathe tools, ideal when screw cutting or making form tools. I made this from a design by Jim Whetren and drawings found on the Model Engineer website and from stock I had in my scrap box and standard materials in stock. It is a bit fiddly to use but the results are good and very small radius' can be made without too much trouble. It's all about care in setting up in the first place. My next accessory is already on the bench - a 4 facet drill sharpener. Hopefully I can sort out the box of drills I've been gathering for the last few years!
I bought the four facet drill sharpening jig from Hemingway and it took best part of a week to make. A lot of care needs to be taken to make sure the hole for the drive nut in the main body is central or mating with the feed screw will be out.
I made a small gauge out of scrap for setting the angle of the drill carrier.
Using the tool can be quite fiddly but with a bit of use it can be both accurate and quick.
I made a small gauge out of scrap for setting the angle of the drill carrier.
Using the tool can be quite fiddly but with a bit of use it can be both accurate and quick.
